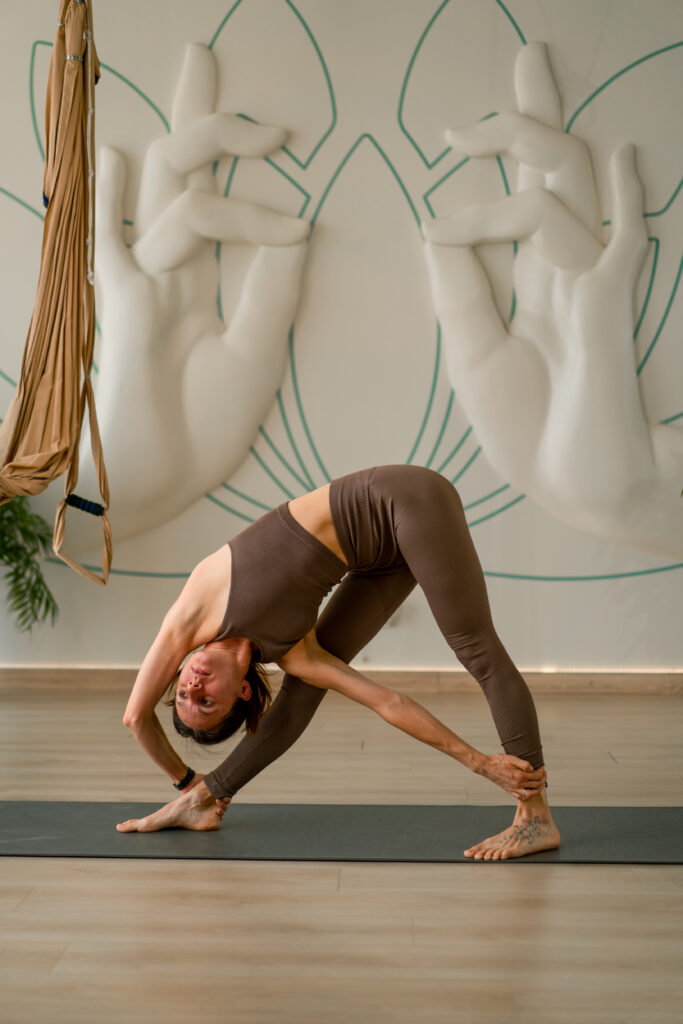
Trikonasana or Utthita Trikonasana (extended triangle) never gets old for me. A foundational standing pose, it stretches the side body and tests my core. In this pose I will share my favorite verbal cues, provide alternative arm and leg positions, and also modifications.
Tri | Kon | Asana
tri: three
kon: angle, corner
asana: pose
Feet
Feet can either be heel to toe or heel to heel alignment. This means that your feet are either in a tight rope position or slightly apart. The goal is to find the right position where you can maintain balance and the integrity of the pose. The tight rope position will challenge your stability more.
The front foot points forward and the back foot points to the top corner of the mat. So if the left foot is the back foot, it points to the upper-left-hand corner.
Legs
Keep the legs straight. There’s a tendency, for the front knee to bend in order to reach the floor, but resist the urge. Instead, engage the legs by lifting up the kneecaps to contract the thighs,
Thighs and Hips
Inwardly rotate thighs. Or think of the front hip scooping under and the back hip opening up to the sky.
Hips push back. This will help you reach your torso forward.
You can envision someone taking your front hand and pulling you forward and the goal is to keep the legs stable and in place.
Chest
Keep the chest facing the side and do not let it drop to the ground. Think of rotating the chest so it points upwards.
Shoulders and Arms
The Iyengar and Ashtanga version of trikonasana has the fingers of the top arm pointing to the sky. This is a good reminder to not collapse the chest and to maintain the integrity of the torso. Personally, I like to have the arms next to the ear and have the fingers pointing forward. But when starting the pose, the traditional way helps you keep a solid upper body alignment.
Hands and Fingers
How far you reach forward will determine where the bottom hand will land. This can be next to the front calf, ankle, grab on to the toe, or all the way to the floor, But remember that the goal is not to touch the floor if it compromises your straight legs and lifted chest. You can certainly use a block and place it next to your front foot to rest the hand, but you want the core and legs to remain stable and not rely on dumping weight on the hand.
In all yoga poses, think of energy radiating throughout the body and that includes the fingers. You can keep the fingers spread wide apart or together, as long as you are consciously reaching in all directions to feel the full extent of the pose.
Neck, Head, and Gaze
Trikonasana releases my neck and it feels good. Traditionally, the gaze is on the top hand and fingers or the sky. If the neck hurts, you can look at the front toes. The point is to keep the head and gaze steady.
Blocks
I highly recommend using a block when you’re starting this pose. It helps distribute the weight form the torso. You can slowly decrease the weight on the hands and let the torso carry the weight.
Balance and Core
When you feel comfortable in the traditional pose without the block, you can try having the top arm next to the ear and the fingers pointing forward. For even more intensity, the bottom arm lifts so both arms are parallel framing the head. This tests leg stability and core strength.
Adding a Twist (not the regular parivrtta trikonasana or revolved triangle)
When you can easily place your hand on the ground without compromising the integrity of the pose, you can add a twist. The top hand catches the front ankle and the bottom hand holds on to the back ankle.


